The LORD bless you and keep you
The LORD make his face shine on you and be gracious to you
The LORD turn his face toward you and give you peace
Numbers 6:24, 25, 26
Showing posts with label Bible Verse. Show all posts
Showing posts with label Bible Verse. Show all posts
Sunday, May 12, 2013
Friday, May 10, 2013
Decorating Vintage Books
I love decorating with old books, this time I decided to Decorate the Books.
Usually I just stack them or wrap twine around them and add them to my vignettes. I've seen so many amazing decorated books I decided to try some for my self.
It was easy and fun!
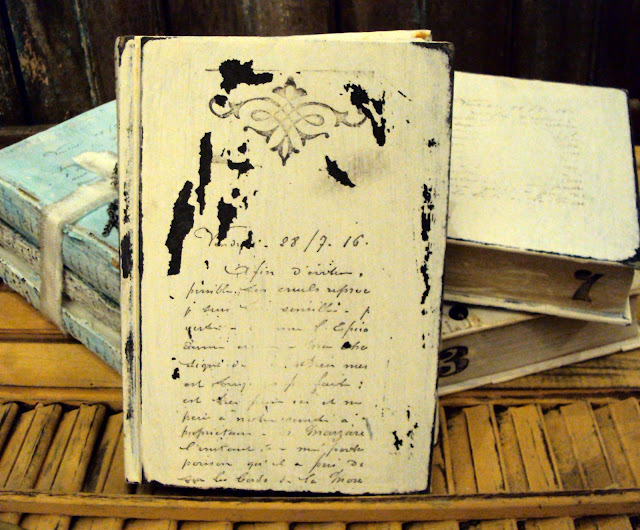
This first set I decided to paint, and since I love the way chalk paint looks on my other projects, I decided to use it on the books, so I mixed up a batch...
I decided to use my long neglected stamps to decorate the covers, and spines, then sand them a little more for a deeper distressed look.
I added some some old upholstery tacks...
A little twine, a rusty gear, and an old skeleton key, complete the 1st bundle
I added a little color, my favorite, for the 2nd set, that were
"cover-less" I wanted it very light so I watered down the paint and gave
it a quick "wash"
Let me know if you have any questions...
Thank you for visiting with me today, hopefully you have been inspired in some small way...
Please leave a comment so I know you were here, they really do make my day!
If you like it, PIN IT
God's Blessing to you and your families, have a wonderful day!
Labels:
Adorned Books,
Altered Books,
Bible Verse,
Book Bundles,
Book Stacks,
French Script,
Old Jewelry,
Old Tricycle Tire,
Ribbon,
Rusty,
Rusty Gears,
Rusty Old Keys,
Rusty Scale,
Twine,
Vintage Books,
Vintage Jewelry
Sunday, April 7, 2013
Repurposed Dresser Drawer
Sorry I don't have any pictures of the full dresser, only what survived...
I painted the outside with Chalk paint, a coat of white, then Turquoise, and distressed it some with sandpaper
I love how it turned out! I can use it like this on a tabletop or
I painted the inside with Chalkboard paint, and lined the sides with a yardstick
Let me know if you have any questions...
Thank you for visiting with me today, hopefully you
have been inspired in some small way...
Please leave a comment so I know you were here, they
really do make my day!
If you like it, PIN
IT
God's Blessing to you
and your families, have a wonderful day!
Sunday, March 24, 2013
Still waiting on Spring!
Even though the calendar says spring... The weatherman is predicting yet another WINTER SNOW STORM! So while I anxiously await the arrival of the real Spring, I thought I would entertain myself with some pictures from last years Spring.
Spring, a time of New Beginnings, an easy little project, a small birds nest made from chicken wire and moss, with a few little clay eggs.
Fresh Ivy from the yard adds a little green touch to the fresh daffodils. One of best things about my Spring display is that it didn't cost me a dime, I had everything I needed, just needed to shop around the house!
I made the "He is Risen" Wreath from a small grapevine wreath, some moss and twigs from the yard, what better way to say All things are new again!
Thank you for visiting with me today, hopefully you have been inspired in some small way...
Please leave a comment so I know you were here, they really do make my day!
If you like it, PIN IT
God's Blessing to you and your families, have a wonderful day!
Sharing with:


Labels:
Bible Verse,
Bird Nest,
Easter,
Flowers,
Ladders,
Old Door,
Old Window,
Shabby,
Spring,
Wreaths
Sunday, November 25, 2012
Vintage Mail Box - It's A Chalkboard!
Philemon 1:21
Is there anything that can't be made into a Chalkboard?
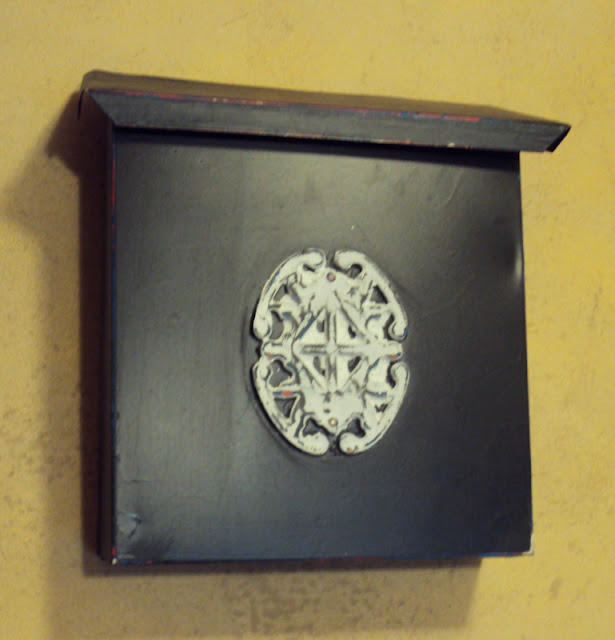
This summer I picked up this Vintage metal Mailbox at a yard sale, it's been sitting in my "stash" ever since. So I decided it was time to put some paint to it!
After I gave it a coat of Black paint, I thought... sometimes I do that...
Maybe it would look cute, painted with Chalkboard Paint, so you could write messages on it
Most of the time these wall mailboxes on a covered porch, or even just used for display inside, so I went for it!
How cute would it be to leave messages for your mailman!
Super Easy Project just used Spray Chalkboard paint, about 3 coats over the base coat of Flat Black
Then painted the front Medallion White, and distressed the whole thing to give it a more aged look
I then "Cured" it, This is an important step, all you need to do is take the side of a piece of chalk and color in all the areas that will be used as a chalkboard. First run the chalk Horizontal, the vertical, and wipe it off. I did this several times. If you don't "cure" it, the first things you write will never go away completely.
Let me know if you have any questions...
Thank you for visiting with me today, hopefully you
have been inspired in some small way...
Please leave a comment so I know you were here, they
really do make my day!
If you like it, PIN
IT
God's Blessing to
you and your families, have a wonderful day!
Sharing with:

Monday, November 5, 2012
How to make a Bed Spring Christmas Tree
Matthew 1:21
Bed Spring ChristmasTrees
How to:
I made 3 Trees, each slightly different
Materials:
Cheap, but messy and time consuming
Double 3D Stars:
I used my Cricut to cut 2 sizes of stars out of cardstock, I cut 6 Large, and 3 small. (The actual book pages were to brittle to run through the Cricut) I then traced the stars on the pages and cut them out by hand and glued them on the cardstock stars.
I made mine double, just make a single sided 3D Star and attached to the front of the bigger ones.
I used the these instructions to make the Stars 3 D, found the instructions via Pinterest, Just like these from:
http://thegluegungirl.blogspot.com/2011/11/how-to-make-3d-cardboard-stars.html
I further aged the book pages using brown stamping ink around the edges, added glitter and puff paint, "snow".
I attached them to the tree top with the small springs and a hot glue gun.
Trees:
I stuck a stick into the foam in a clay pot, and glued the top of a Spring to the top of the stick, and added some "stick" braces here and there to hold it straight.
I added snow to 2 trees by appling puff paint and using a heat gun to activate (puff) the paint. Then added red berries to all 3, sprayed the tress with spray Adhesive and just sort of "patted" the moss around. I covered the foam in the pot with moss also and added a snow around the bottom.
Hot glue a little Jute bow and we have a Spring Tree!
Aged Terra Cotta Pots:
You can use new or old clay pots, just randomly rub a candle over the surface, then paint (I used white paint). Take a clean dry cloth and wipe the paint off, some of the paint will remain giving it that wonderful aged look.
This is really my time doing a post with instructions, so let me know if I missed anything or you have any questions!
Bed Spring ChristmasTrees
How to:
I made 3 Trees, each slightly different
Materials:
- 3 Rusty Old Bed Springs (from an old bed)
- 3 Rusty Old Small Springs (they were from the Bed also)
- 3 Old Clay Pots, aged even more with candle wax and paint
- Floral Foam (from the Dollar Tree)
- Jute
- White Puff Paint (for the snow)
- Spanish Moss (from the Dollar Tree)
- Moss, (from the Dollar Tree)
- Red Berries (from my Yard)
- 3 Sticks (from the Yard)
- Old Book Pages
- Clear Glitter
- Spray Adhesive
- Hot Glue
- 1 sheet of Cardstock
- Brown Stamp Pad
Cheap, but messy and time consuming
Double 3D Stars:
I used my Cricut to cut 2 sizes of stars out of cardstock, I cut 6 Large, and 3 small. (The actual book pages were to brittle to run through the Cricut) I then traced the stars on the pages and cut them out by hand and glued them on the cardstock stars.
I made mine double, just make a single sided 3D Star and attached to the front of the bigger ones.
I used the these instructions to make the Stars 3 D, found the instructions via Pinterest, Just like these from:
http://thegluegungirl.blogspot.com/2011/11/how-to-make-3d-cardboard-stars.html
I further aged the book pages using brown stamping ink around the edges, added glitter and puff paint, "snow".
I attached them to the tree top with the small springs and a hot glue gun.
Trees:
I stuck a stick into the foam in a clay pot, and glued the top of a Spring to the top of the stick, and added some "stick" braces here and there to hold it straight.
I added snow to 2 trees by appling puff paint and using a heat gun to activate (puff) the paint. Then added red berries to all 3, sprayed the tress with spray Adhesive and just sort of "patted" the moss around. I covered the foam in the pot with moss also and added a snow around the bottom.
Hot glue a little Jute bow and we have a Spring Tree!
Aged Terra Cotta Pots:
You can use new or old clay pots, just randomly rub a candle over the surface, then paint (I used white paint). Take a clean dry cloth and wipe the paint off, some of the paint will remain giving it that wonderful aged look.
This is really my time doing a post with instructions, so let me know if I missed anything or you have any questions!
Thank you for visiting with me today, hopefully you have been inspired in some small way...
Please leave a comment so I know you were here, they really do make my day!
As always if you like it, PIN IT
God's Blessing to you and your families, have a wonderful day!
Subscribe to:
Posts (Atom)


